
General Overview
This material discusses the handling of forms and the login process using native PHP. In the development of web applications, forms are an important element to receive input from users, such as login data. Therefore, understanding how forms work and how data is handled by PHP is very important. In addition, the login system is one of the main security features in web applications. This material will guide participants to understand the workflow of the login form, starting from the creation of the form display, the collection of input data, the validation process against the database, to the management of user sessions using sessions.
Learning Achievements
After completing this material, students are expected to be able to:
- Explain the web-based login form workflow.
- Implemented a simple login system using PHP and MySQL.
- Using session to maintain user authentication.
- Secure login data using password hashing techniques.
- Dealing with form input and basic validation.
Practicum Materials
Types of forms
The input form is made with HTML tags. Pages that contain pure form (no php script) should not be saved in php form, it can be in html form. To design an input form, there are at least 3 (three) important things, namely:
- METHOD The method of a form determines how the form's input data is sent. There are two types of this method, namely GET and POST. This method determines how input data is sent and processed by PHP.
- ACTION The action of a form determines where the input data from the form is processed. If this action is left blank, then it is considered that the form process occurs on the same page. So the form page and the process page can be separated or made into one.
- SUBMIT BUTTON Submit button is a button (in general) that functions as a trigger for sending data from an input form. If this button is pressed, then the form data will be sent (processed) on the page specified in the action attribute.
Types of methods
1. GET
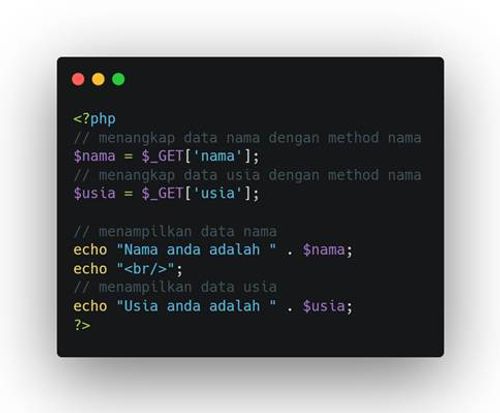
The GET method is used to send data through a URL. Data sent with the GET method will appear publicly in the URL, so that it can be seen by the user or stored in the server log. Some special characters such as spaces will be converted into "+" or "%20" signs.
Example of the GET method:
index.php
tampil.php
then run index.php
the output produced
<?php

session_start();

include 'koneksi/db.php';

$username = $_POST['username'];

$password = $_POST['password'];

$query = "SELECT * FROM users WHERE username='$username'";

$result = mysqli_query($conn, $query);

$user = mysqli_fetch_assoc($result);

if ($user && password_verify($password, $user['password'])) {

    $_SESSION['user'] = $user['username'];

    header("Location: dashboard.php");

} else {

    echo "Login gagal. Username atau password salah.";

}

?>
2. POST
The POST method is used to send data secretly through an HTTP request. Data sent with the POST method will not appear in the URL, so it is safer and more suitable for sending sensitive data such as passwords or personal information. The data is sent as part of the HTTP request body and is not visible to the user or stored in the server log.
For example:
index.php
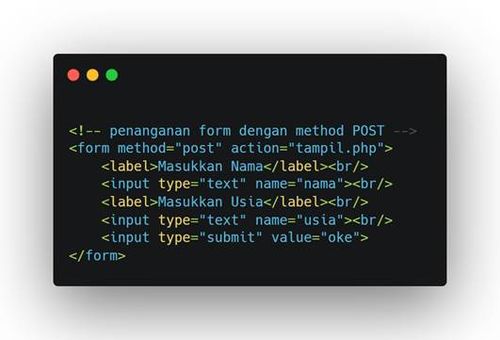
tampil.php
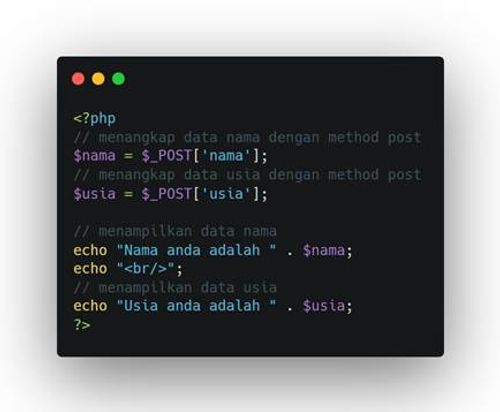
Result
Practicum Training
We will make how the login works on native php. Here are the steps:
1. Folder Structure
2. Create a connection file to the database at connection/db.php
<?php
$host = "localhost";
$user = "root";
$pass
$db = "latihan_login_db";
$conn = mysqli_connect($host, $user, $pass, $db);

if (!$conn) {
  die("Koneksi gagal: ". mysqli_connect_error());
}
?>
After that, create the user table with SQL as follows:
CREATE TABLE users (
  id INT AUTO_INCREMENT PRIMARY KEY,
  username VARCHAR(50) NOT NULL,
  password VARCHAR(255) NOT NULL
);
3. After that, generate password_hash to be entered into the database
password_hash.php
<?php

// misalkan password disini menggunakan 12345
$password_hash = password_hash("12345", PASSWORD_DEFAULT);
echo $password_hash;
Then run php in your terminal password_hash.php

Setelah itu, masukan username dan password_hash yang kita dapatkan ke dalam database.
4. Create an index.php file with a login form
<!DOCTYPE html>

<html lang="en">

<head>

    <meta charset="UTF-8">
    <title>Login</title>
    <link href="https://cdn.jsdelivr.net/npm/[email protected]/dist/css/bootstrap.min.css" rel="stylesheet">

</head>

<body class="bg-light">

<div class="container mt-5">
    <div class="row justify-content-center">
        <div class="col-md-4">
            <div class="card shadow-sm rounded-4">
                <div class="card-body">
                    <h3 class="text-center mb-4">Login</h3>
                    <form method="POST" action="login.php">
                        <div class="mb-3">
                            <label for="username" class="form-label">Username</label>
                            <input type="text" name="username" class="form-control" id="username" required>
                        </div>
                        <div class="mb-3">
                            <label for="password" class="form-label">Password</label>
                            <input type="password" name="password" class="form-control" id="password" required>
                        </div>
                        <button type="submit" class="btn btn-primary w-100">Login</button>
                    </form>
                </div>
            </div>
        </div>
    </div>
</div>
</body>
</html>
5. Create a login.php file
<?php

session_start();

include 'koneksi/db.php';

$username = $_POST['username'];

$password = $_POST['password'];

$query = "SELECT * FROM users WHERE username='$username'";

$result = mysqli_query($conn, $query);

$user = mysqli_fetch_assoc($result);

if ($user && password_verify($password, $user['password'])) {

    $_SESSION['user'] = $user['username'];

    header("Location: dashboard.php");

} else {

    echo "Login gagal. Username atau password salah.";

}

?>
session_start() :
- Used to start a session. This session is important so that we can save login data (such as username) into the server's memory and use it between pages.
- For example, if the login is successful, we will save the username into the session.
include 'connection/db.php'; :
- This line inserts the connection/db.php file that contains the connection to the MySQL database.
- So, we don't need to rewrite the connection configuration in this file.
Take data from the login form (POST method):
- $_POST['username']: Retrieve data from input form name="username".
- $_POST['password']: Retrieve data from input form name="password".
Note: At an advanced stage, we should also do input validation or input filter to be more secure (for example htmlspecialchars() or string validation).
Checking:
- if ($user): Check if the username is found in the database.
- password_verify(): Built-in PHP function to compare the password entered by the user ($password) with the hashed password in the database ($user['password']).
This is a safe way to verify passwords because we do not compare passwords directly (plaintext), but through a secure hash.
If login is successful:
- Save the username into the session ($_SESSION['user']) so that it can be used on other pages (eg dashboard.php).
- Redirect to the dashboard page using header().
6. Create a dashboard.php file
<?php

session_start();

if (!isset($_SESSION['user'])) {

    header("Location: index.php");

    exit;

}

?>

<!DOCTYPE html>

<html lang="en">

<head>

    <meta charset="UTF-8">

    <title>Dashboard</title>

    <link href="https://cdn.jsdelivr.net/npm/[email protected]/dist/css/bootstrap.min.css" rel="stylesheet">

</head>

<body>

<nav class="navbar navbar-expand-lg navbar-dark bg-dark">

  <div class="container">

    <a class="navbar-brand" href="#">MyApp</a>

    <div class="d-flex">

      <a href="logout.php" class="btn btn-outline-light">Logout</a>

    </div>

  </div>

</nav>

<div class="container mt-5">

    <div class="alert alert-success rounded-4 shadow-sm" role="alert">

        <h4 class="alert-heading">Selamat Datang, <?php echo htmlspecialchars(_SESSION['user']); ?>!</h4>

        <p>Kamu berhasil login ke dalam sistem. Ini adalah halaman dashboard sederhana.</p>

    </div>

</div>

</body>

</html>
7. Create a logout.php file
<?php

session_start();

session_destroy();

header("Location: index.php");
- session_destroy()
- This line works to delete all stored session data , including login data such as $_SESSION['user'].
- This is used when the user wants to log out of the system.
Once executed, all information stored in the session will be lost, meaning the user is considered to have exited the application
header("Location: index.php");
- Redirect to login page
- After the session is deleted, the user is directly directed to index.php (login page).
- This makes the user experience clear: after logging out, he immediately returns to the page to log in again.
- Please try logging in using the database
Refrensi
https://pilarsolusi.co.id/pemrograman/perbedaan-antara-metode-get-dan-post-dalam-pemrograman-php/
https://www.malasngoding.com/belajar-php-penanganan-form-pada-php/